![パパ](https://arigatou-jinsei.jp/wp-content/uploads/2021/01/新しい画像.bmp)
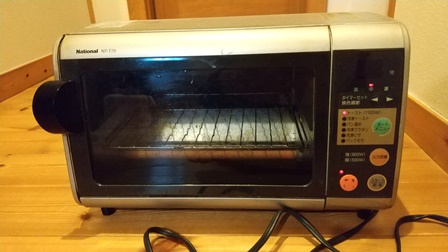
20年以上使ってきた我が家のパナソニック(ナショナル)製のトースターの電源が点かなくなってしまったと妻が残念がっていましたので、いよいよ寿命かもとチェックしていきました。
![](https://i0.wp.com/arigatou-jinsei.jp/wp-content/uploads/2022/06/DSC_0005-1.jpg?resize=448%2C252&ssl=1)
![パパ](https://arigatou-jinsei.jp/wp-content/uploads/2021/01/新しい画像.bmp)
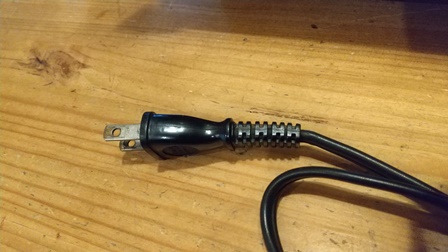
コンセントの付け根の形が盛り上がって不自然な気がしたので、動かしたら点いたり点かなかったりしていました。初めてですが、今回コンセントプラグを自分で交換してみることにしました😀
DIYでトースターを修理 必要な工具と材料
![](https://i0.wp.com/arigatou-jinsei.jp/wp-content/uploads/2022/06/DSC_0006-3-rotated-e1655412704774.jpg?resize=448%2C252&ssl=1)
![パパ](https://arigatou-jinsei.jp/wp-content/uploads/2021/01/新しい画像.bmp)
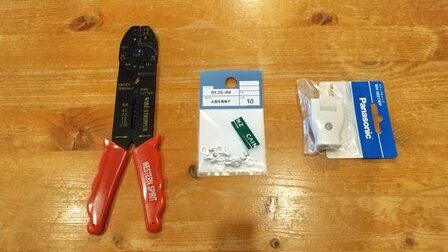
右のプラグ(スナップキャップ)はアマゾンで107円、こちらもパナソニック製で送料無料(安い!)で取寄せたのが届き、真ん中の圧着端子はカインズで10個入り90円で購入しておきました。
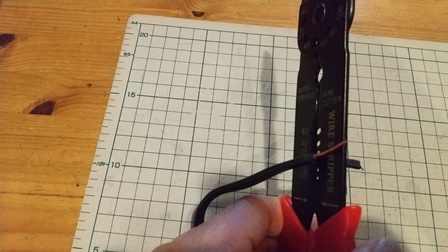
ワイヤーストリッパー
![](https://i0.wp.com/arigatou-jinsei.jp/wp-content/uploads/2022/06/DSC_0007-2.jpg?resize=448%2C252&ssl=1)
![パパ](https://arigatou-jinsei.jp/wp-content/uploads/2021/01/新しい画像.bmp)
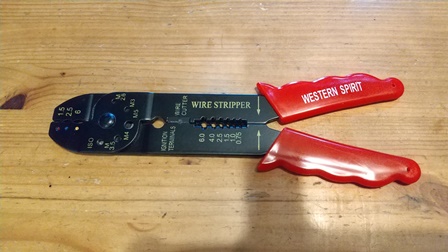
ワイヤーストリッパーはカッターの部分で不必要な配線を切ったり、綺麗に被膜をはがしたりすることが出来るので、電化製品等を修理する際にはあると便利です☆
ワイヤーストリッパーを使ってコンセントプラグを交換
![](https://i0.wp.com/arigatou-jinsei.jp/wp-content/uploads/2022/06/DSC_0008-2-rotated.jpg?resize=252%2C448&ssl=1)
![](https://i0.wp.com/arigatou-jinsei.jp/wp-content/uploads/2022/06/DSC_0009-3.jpg?resize=448%2C252&ssl=1)
![パパ](https://arigatou-jinsei.jp/wp-content/uploads/2021/01/新しい画像.bmp)
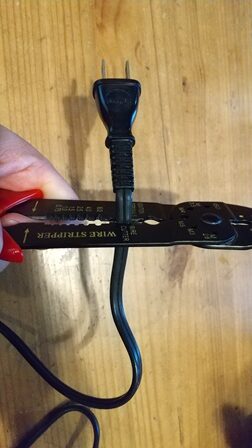
カッターの部分で折れ曲がっている配線部分を切ります。
![](https://i0.wp.com/arigatou-jinsei.jp/wp-content/uploads/2022/06/DSC_0010-2.jpg?resize=448%2C252&ssl=1)
![パパ](https://arigatou-jinsei.jp/wp-content/uploads/2021/01/新しい画像.bmp)
カッターで2cm位配線の真ん中を切っておきます。
![](https://i0.wp.com/arigatou-jinsei.jp/wp-content/uploads/2022/06/DSC_0011-3.jpg?resize=448%2C252&ssl=1)
![パパ](https://arigatou-jinsei.jp/wp-content/uploads/2021/01/新しい画像.bmp)
1.5の穴に片方の配線を入れて被膜をはがします。穴に配線を挟んで軽く握って固定します。 穴と配線のサイズ、また剥きたい位置が合っていることを確認したら、強く握ってそのまま引き抜きましょう。 ツルリと被膜が剥けるはずです。
![](https://i0.wp.com/arigatou-jinsei.jp/wp-content/uploads/2022/06/DSC_0001-1-rotated.jpg?resize=252%2C448&ssl=1)
![パパ](https://arigatou-jinsei.jp/wp-content/uploads/2021/01/新しい画像.bmp)
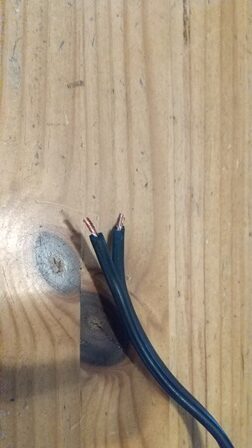
両側共にはぐと銅線が出てくるので、端がほつれないように指先で銅線をつまんでくるくると巻いて整えておきます。
コンセントプラグを交換 圧着端子に通し、圧着します
![](https://i0.wp.com/arigatou-jinsei.jp/wp-content/uploads/2022/06/DSC_0013-2.jpg?resize=448%2C252&ssl=1)
![](https://i0.wp.com/arigatou-jinsei.jp/wp-content/uploads/2022/06/DSC_0014-3.jpg?resize=448%2C252&ssl=1)
![パパ](https://arigatou-jinsei.jp/wp-content/uploads/2021/01/新しい画像.bmp)
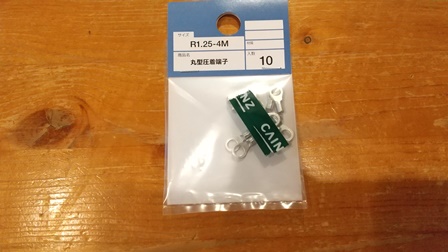
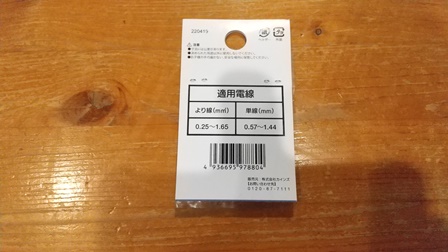
圧着端子はカインズで10個入り90円でした。サイズ(型)はR1.25-4Mを使います。
![](https://i0.wp.com/arigatou-jinsei.jp/wp-content/uploads/2022/06/DSC_0003-1.jpg?resize=448%2C252&ssl=1)
![パパ](https://arigatou-jinsei.jp/wp-content/uploads/2021/01/新しい画像.bmp)
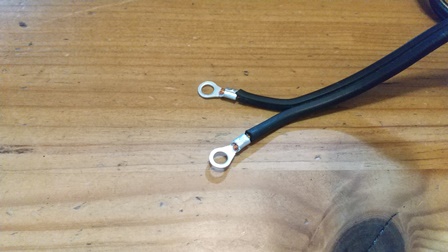
丸型圧着端子の穴に銅線を通して、ワイヤーストリッパーの1.5サイズの穴に合わせて圧着します。
コンセントプラグ(スナップキャップ)を交換
![](https://i0.wp.com/arigatou-jinsei.jp/wp-content/uploads/2022/06/DSC_0017-2-rotated-e1655446583775.jpg?resize=448%2C252&ssl=1)
![パパ](https://arigatou-jinsei.jp/wp-content/uploads/2021/01/新しい画像.bmp)
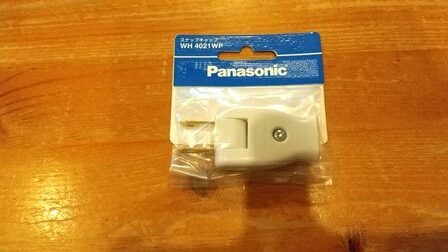
パナソニック製で良いのに、なぜか送料無料で107円で購入できました☆
![](https://i0.wp.com/arigatou-jinsei.jp/wp-content/uploads/2022/06/DSC_0019-2.jpg?resize=448%2C252&ssl=1)
![パパ](https://arigatou-jinsei.jp/wp-content/uploads/2021/01/新しい画像.bmp)
プラスドライバーを使って、コンセントのふたを外しておきます。
![](https://i0.wp.com/arigatou-jinsei.jp/wp-content/uploads/2022/06/DSC_0004-2.jpg?resize=448%2C252&ssl=1)
![パパ](https://arigatou-jinsei.jp/wp-content/uploads/2021/01/新しい画像.bmp)
丸型圧着端子の穴にコンセントプラグのねじを通して、プラスドライバーで絞めていきます。
![](https://i0.wp.com/arigatou-jinsei.jp/wp-content/uploads/2022/06/D_00014-rotated-e1655470566110.jpg?resize=448%2C252&ssl=1)
![パパ](https://arigatou-jinsei.jp/wp-content/uploads/2021/01/新しい画像.bmp)
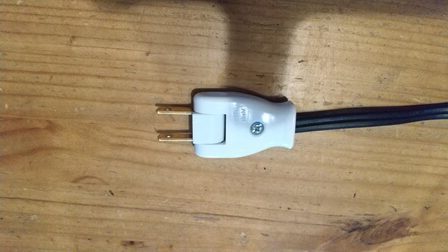
これでこコンセンントプラグの交換作業は完了です。
![ママ](https://i0.wp.com/arigatou-jinsei.jp/wp-content/themes/cocoon-master/images/woman.png?w=1256&ssl=1)
私もスギ薬局で貯めたポイントで新しいトースターに交換しようか考えていましたが、欲しいものだと12000ポイントは必要になるので躊躇していたところでした。
DIYでトースターを修理 確認
![](https://i0.wp.com/arigatou-jinsei.jp/wp-content/uploads/2022/06/D_00015.jpg?resize=448%2C252&ssl=1)
![パパ](https://arigatou-jinsei.jp/wp-content/uploads/2021/01/新しい画像.bmp)
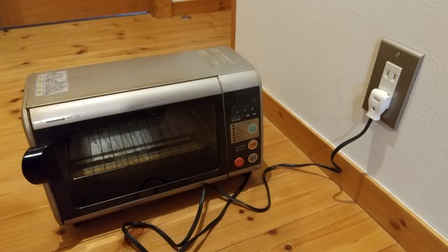
実際に電源が入って使えるか確認をします。
![](https://i0.wp.com/arigatou-jinsei.jp/wp-content/uploads/2022/06/D_00016.jpg?resize=448%2C252&ssl=1)
![パパ](https://arigatou-jinsei.jp/wp-content/uploads/2021/01/新しい画像.bmp)
15分位のDIYで、また無事に生き返ってくれました☆総額197円で修理完了です☆
![ママ](https://i0.wp.com/arigatou-jinsei.jp/wp-content/themes/cocoon-master/images/woman.png?w=1256&ssl=1)
本当に直るなんて思ってなかったです。パパありがとう👏
![パパ](https://arigatou-jinsei.jp/wp-content/uploads/2021/01/新しい画像.bmp)
まだまだ大切に使っていけば大丈夫そうです🍀 なんでもこなせるトースターだと思って使っているので、ほんとに良かったです😊
コメント